

On the download page, for each of our products, you can download the user manual, we recommend that you read the manuals before using our products. Within this page you can find a more detailed answer to some common questions, the page will be updated as new frequently asked questions are identified.
In general, for installation and configuration, it is recommended to always contact experienced people.
Chrome Lite/Plus/Pro/Pro2
The Chrome replicates all the functions of the original dashboard for use on the track. It is therefore NECESSARY to remove the original dashboard by installing Chrome.
All our products are designed for exclusive use on the track. Chrome is not approved for road use. More importantly: on many modern motorcycles, the original dashboard controls the headlights, indicators or the horn. Chrome does not support these functions.
Through our sensor wiring it is possible to connect several sensors in a plug & play way. A standard configuration of the Chrome analog inputs could be:
ANALOG1: TPS
ANALOG2: Fork
ANALOG3: Mono
ANALOG4: Brake pressure
ANALOG5: Lambda
ANALOG6:
ANALOG7: APS
ANALOG8: TC
TPS and APS are normally read by Can Bus if the bike is equipped with a Can Bus or simply by connecting the analog input directly to the original sensor of the bike in the case of analog bikes. A connector for external sensors is therefore not normally required. The TC intervention, when present, is always read via Can Bus. Fork, Mono and brake pressure sensor require a plug & play connection to their respective sensors. In the case of the lambda probe reading, this can be internal (in the case of Chrome plus and Pro) or external, in the latter case a plug & play connection is required.
Given these premises, our sensor wiring has inputs for ANALOG2, ANALOG3, ANALAG4, ANALOG5, ANALOG6 and front speed (the rear one is read together with the RPM from the main connection).
If the front speed is read from the Can Bus line or the Lambda is read internally, it is possible to reuse the wiring connectors simply by moving the connection pin to another input. The connector pinout is present in the chrome manual while at these links you can find an application note on how to remove the pins from the connector.
Multilock application note: Chrome Lite / Plus / Pro
Application note Molex: Chrome Pro2
No. The chrome USB connection is in master mode. By connecting the Chrome to the PC via a common cable you risk damaging the USB port of the PC or of the Chrome itself. Only the Chrome Pro2 can be connected directly to the PC but via a special cable equipped with a double FTDI converter.
In general, Chrome is always repairable and even in the worst case the cost is usually less than replacement. The most common repair is that of replacing the display due to a crash. In this case both the display and the protective glass are replaced (they are glued) and the cost is 145.00 + VAT (for a Chrome Lite).
No repairs or checks are carried out on the wiring, the cost of processing would in fact be higher than the cost of the wiring itself.
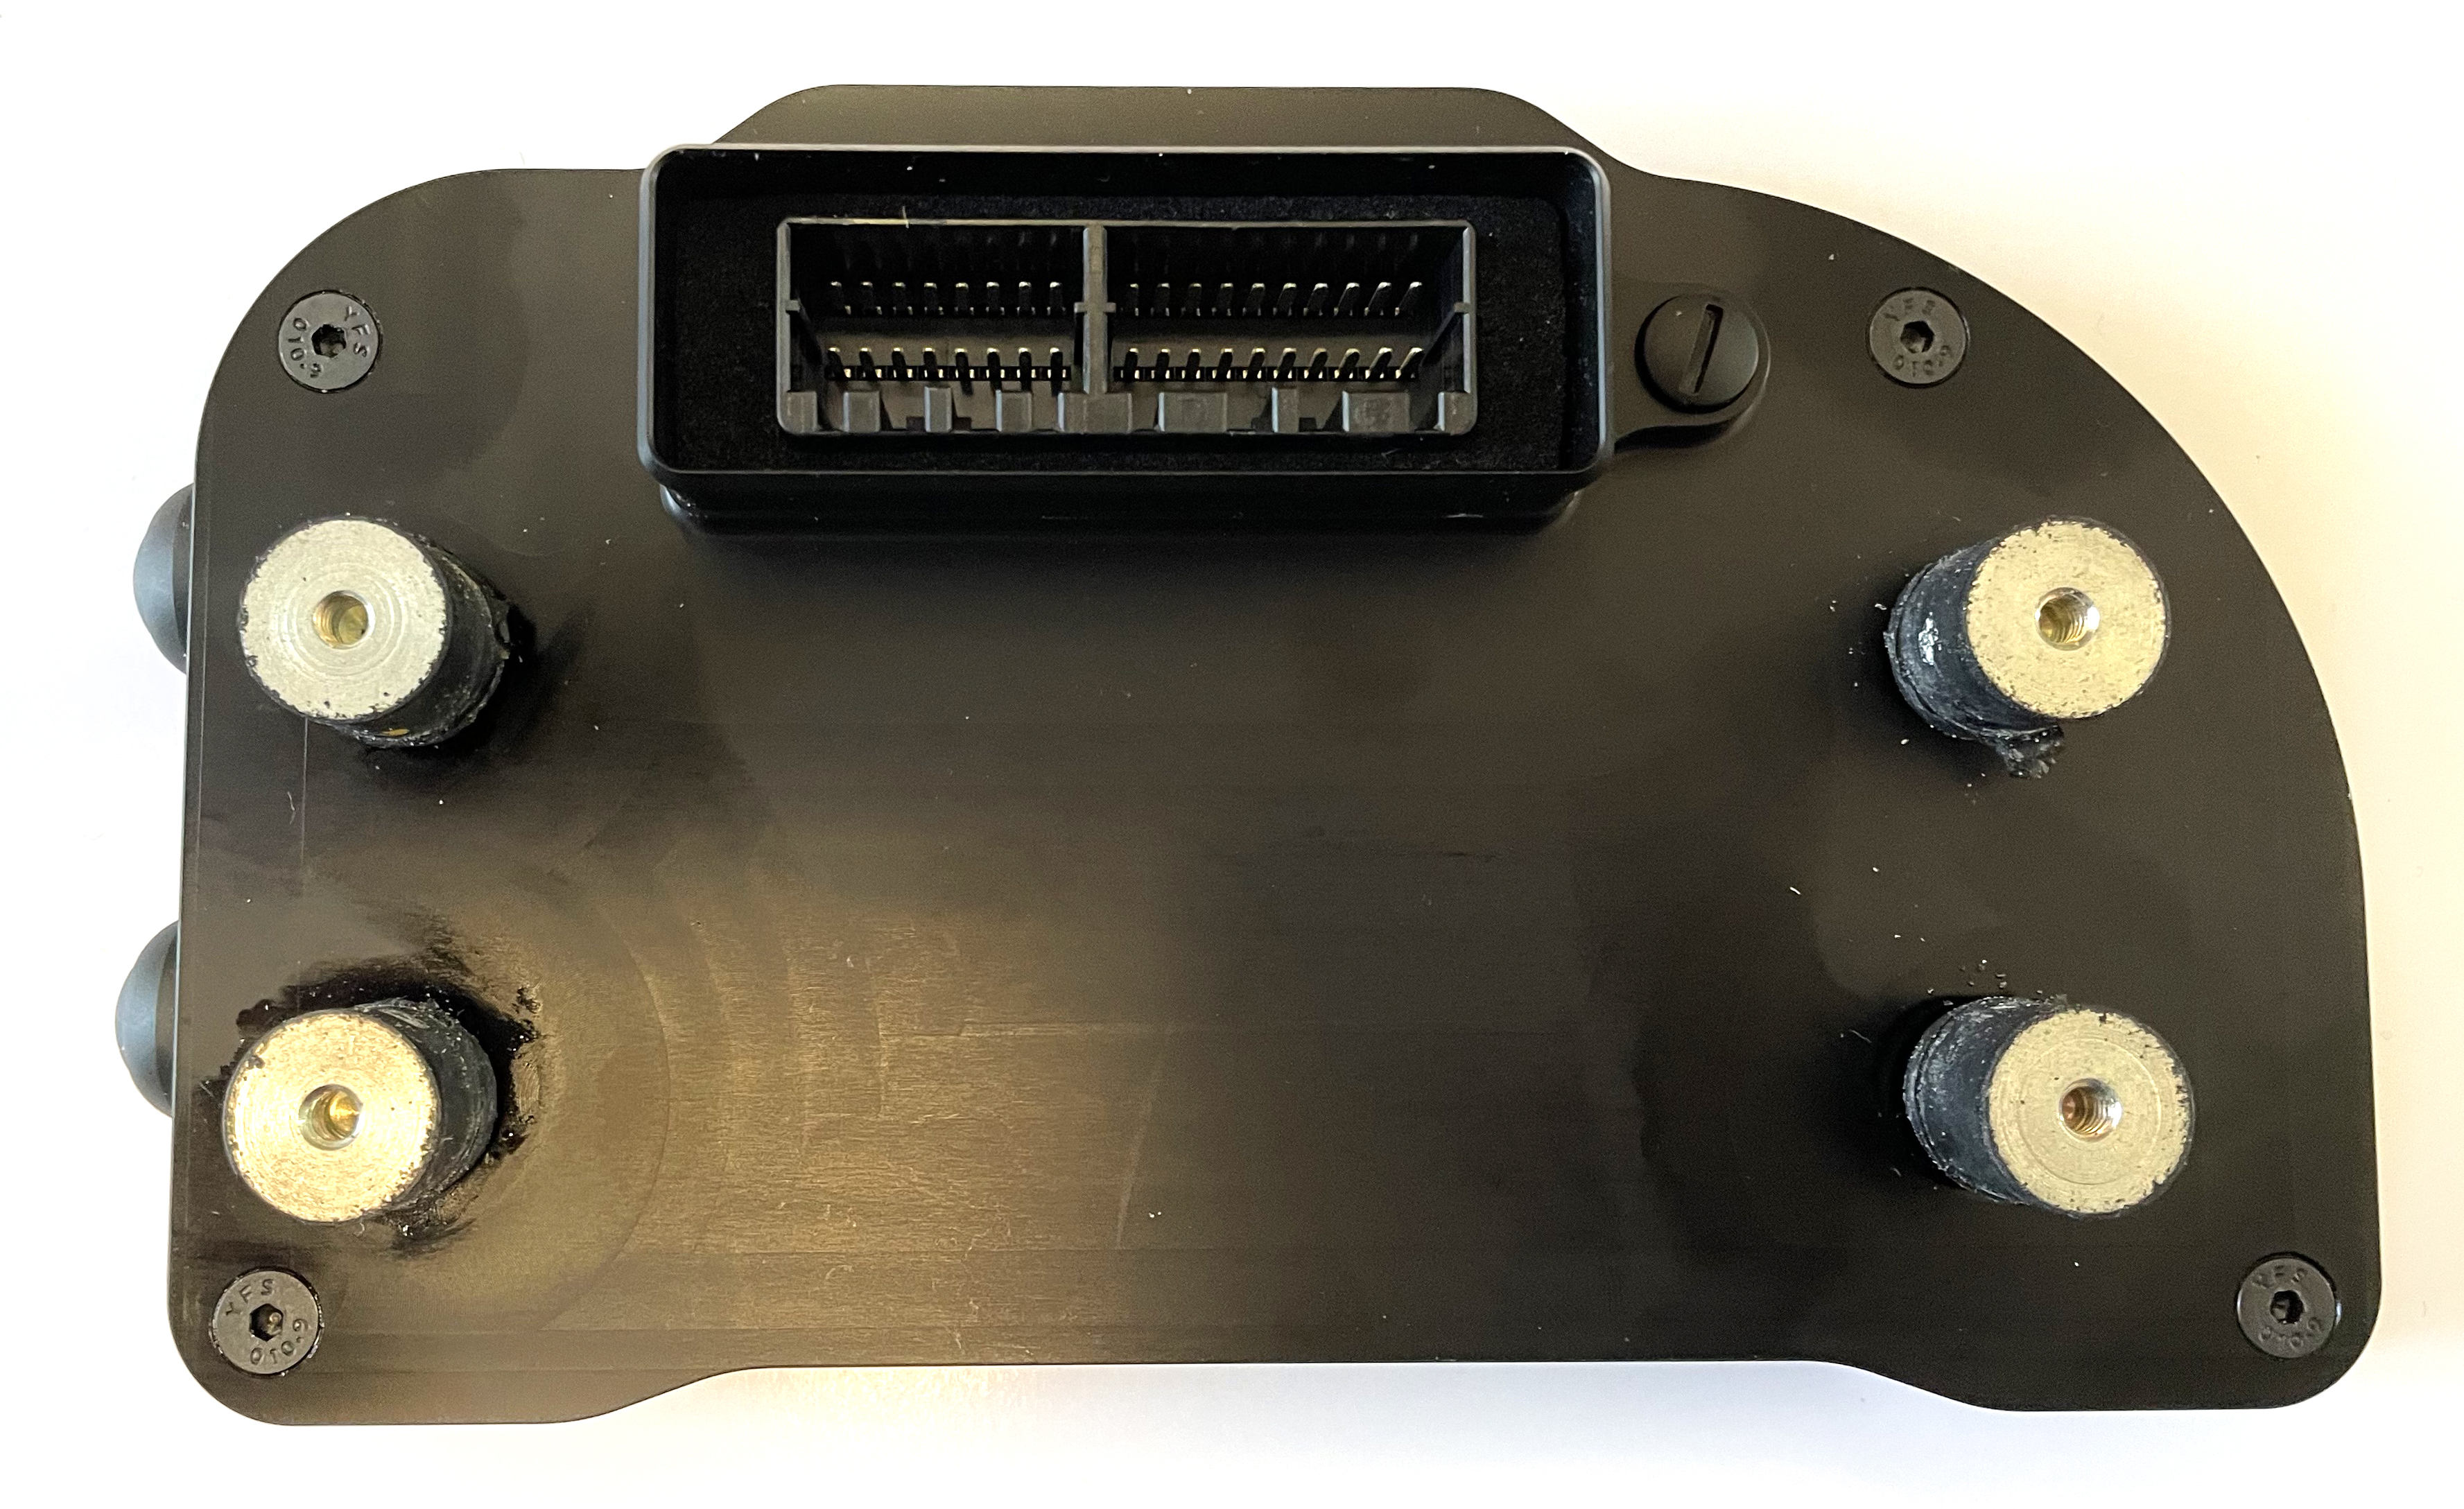
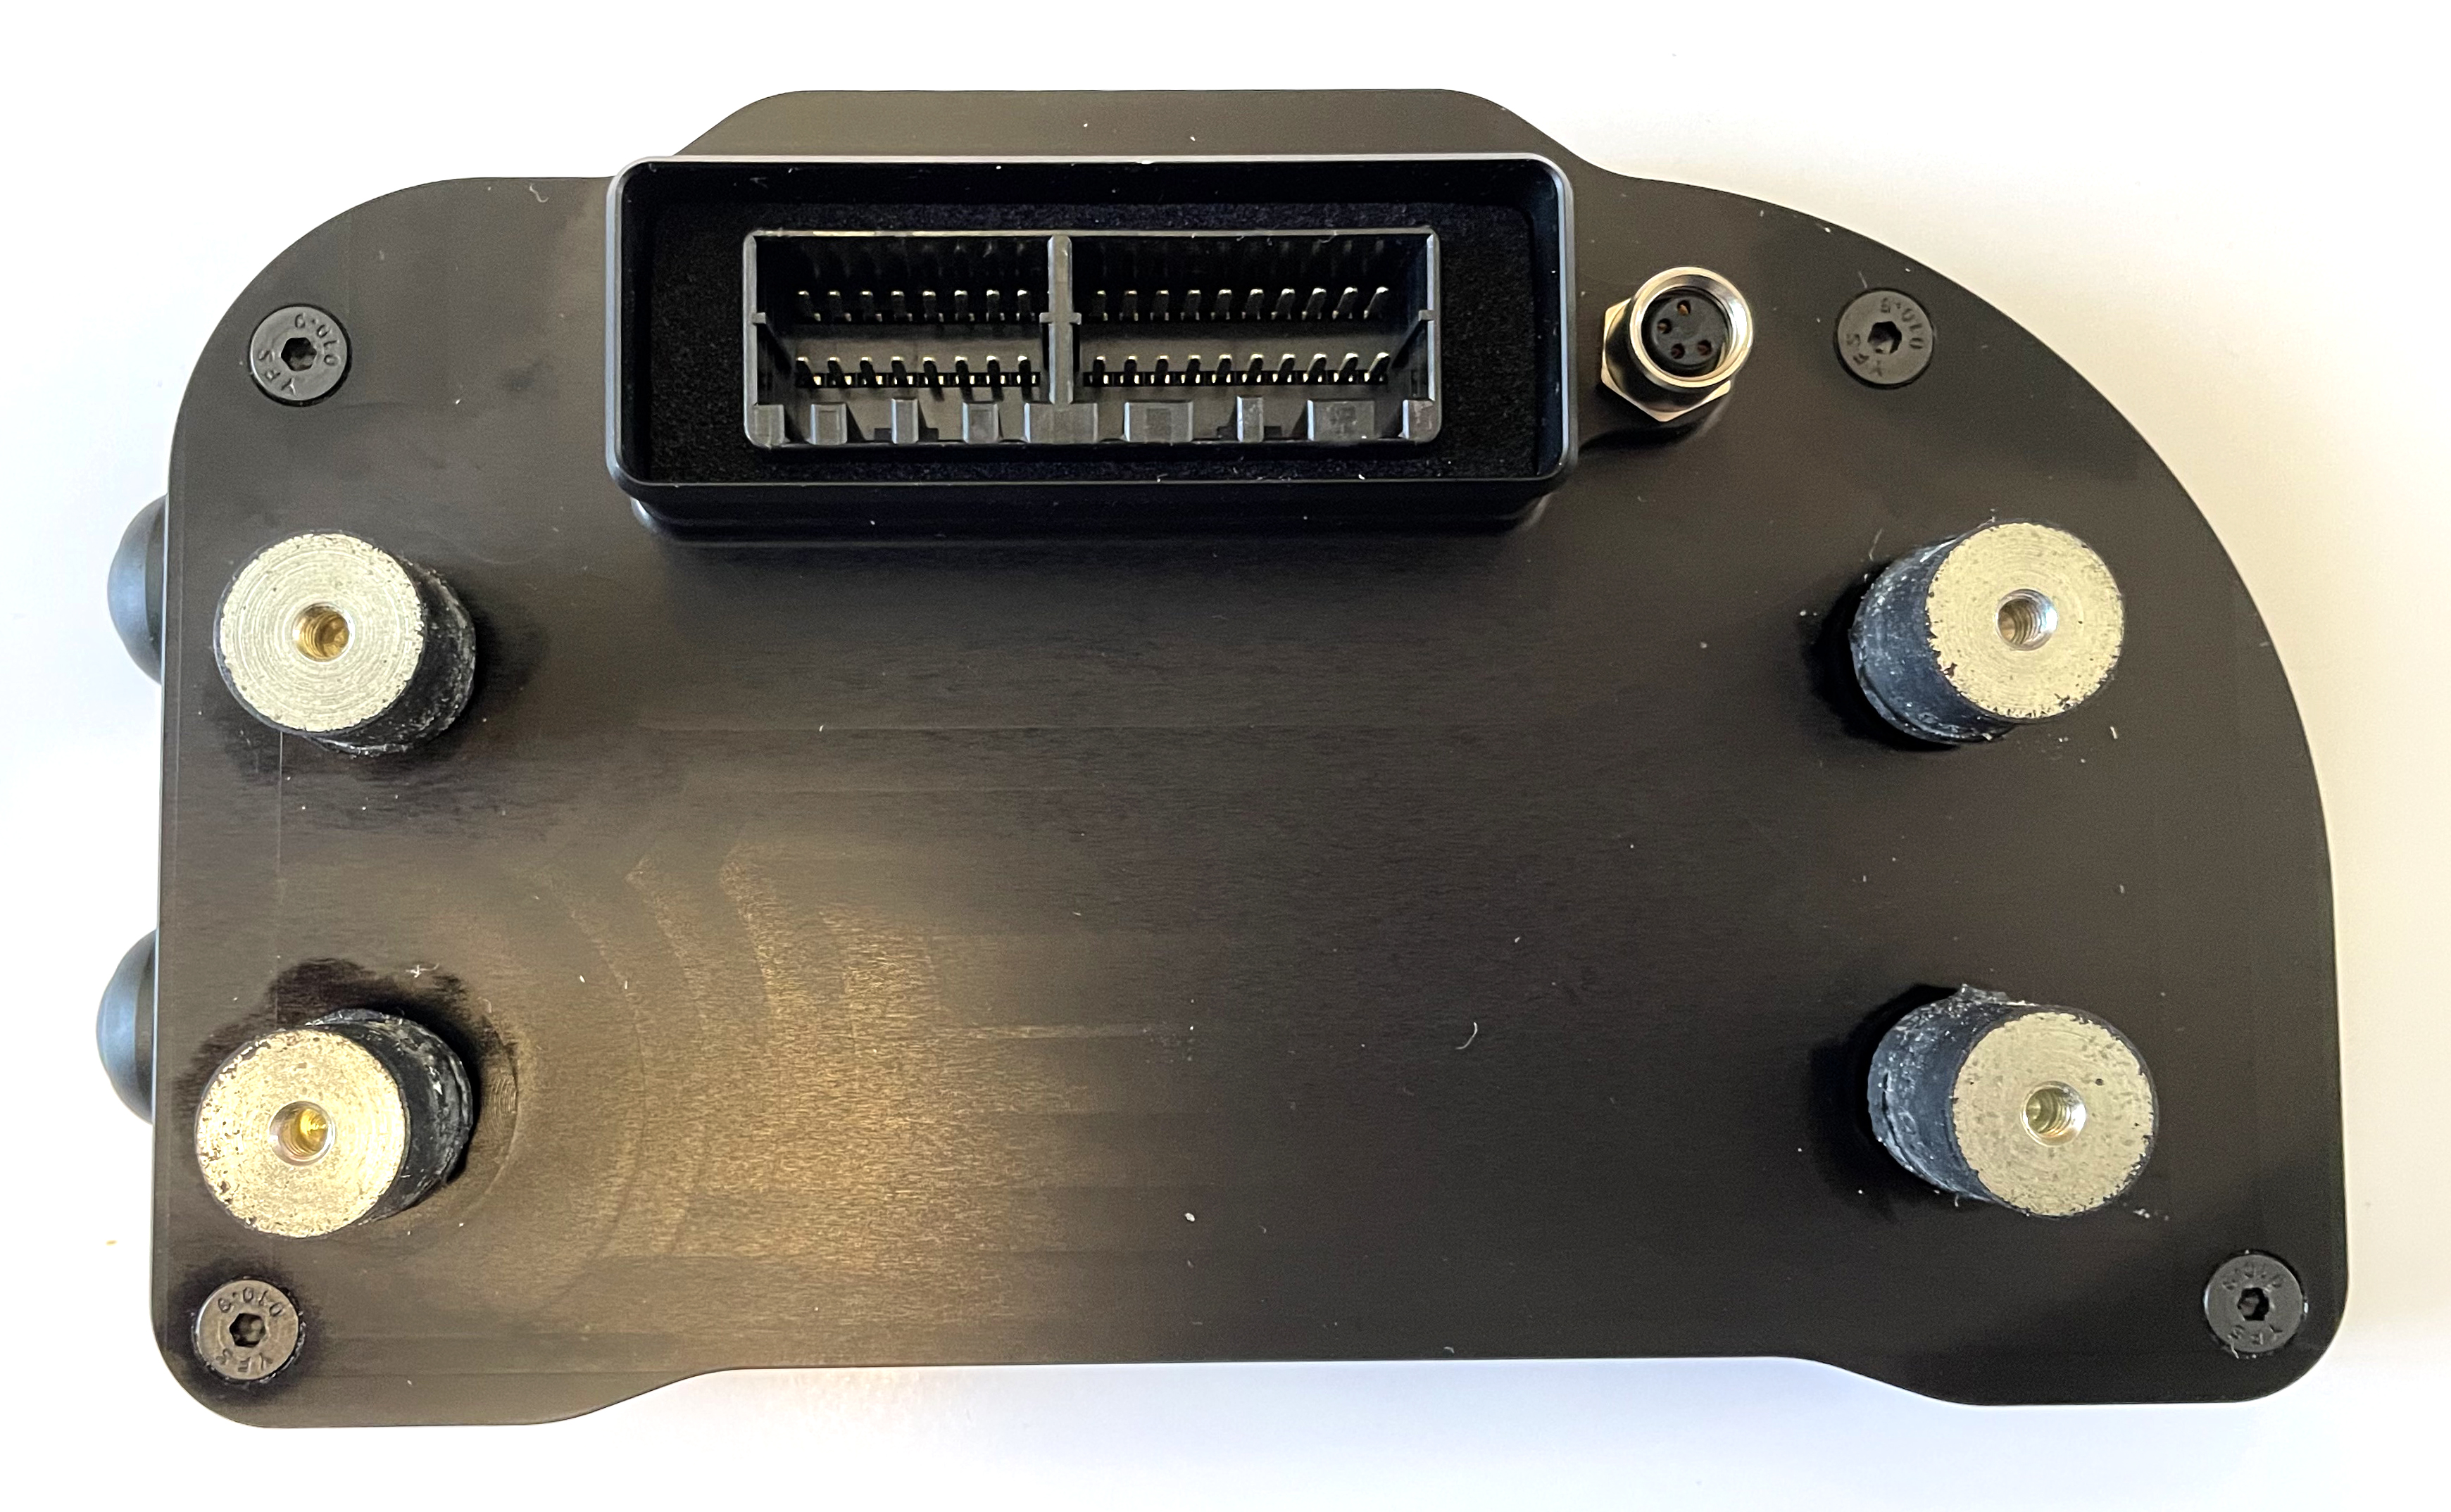
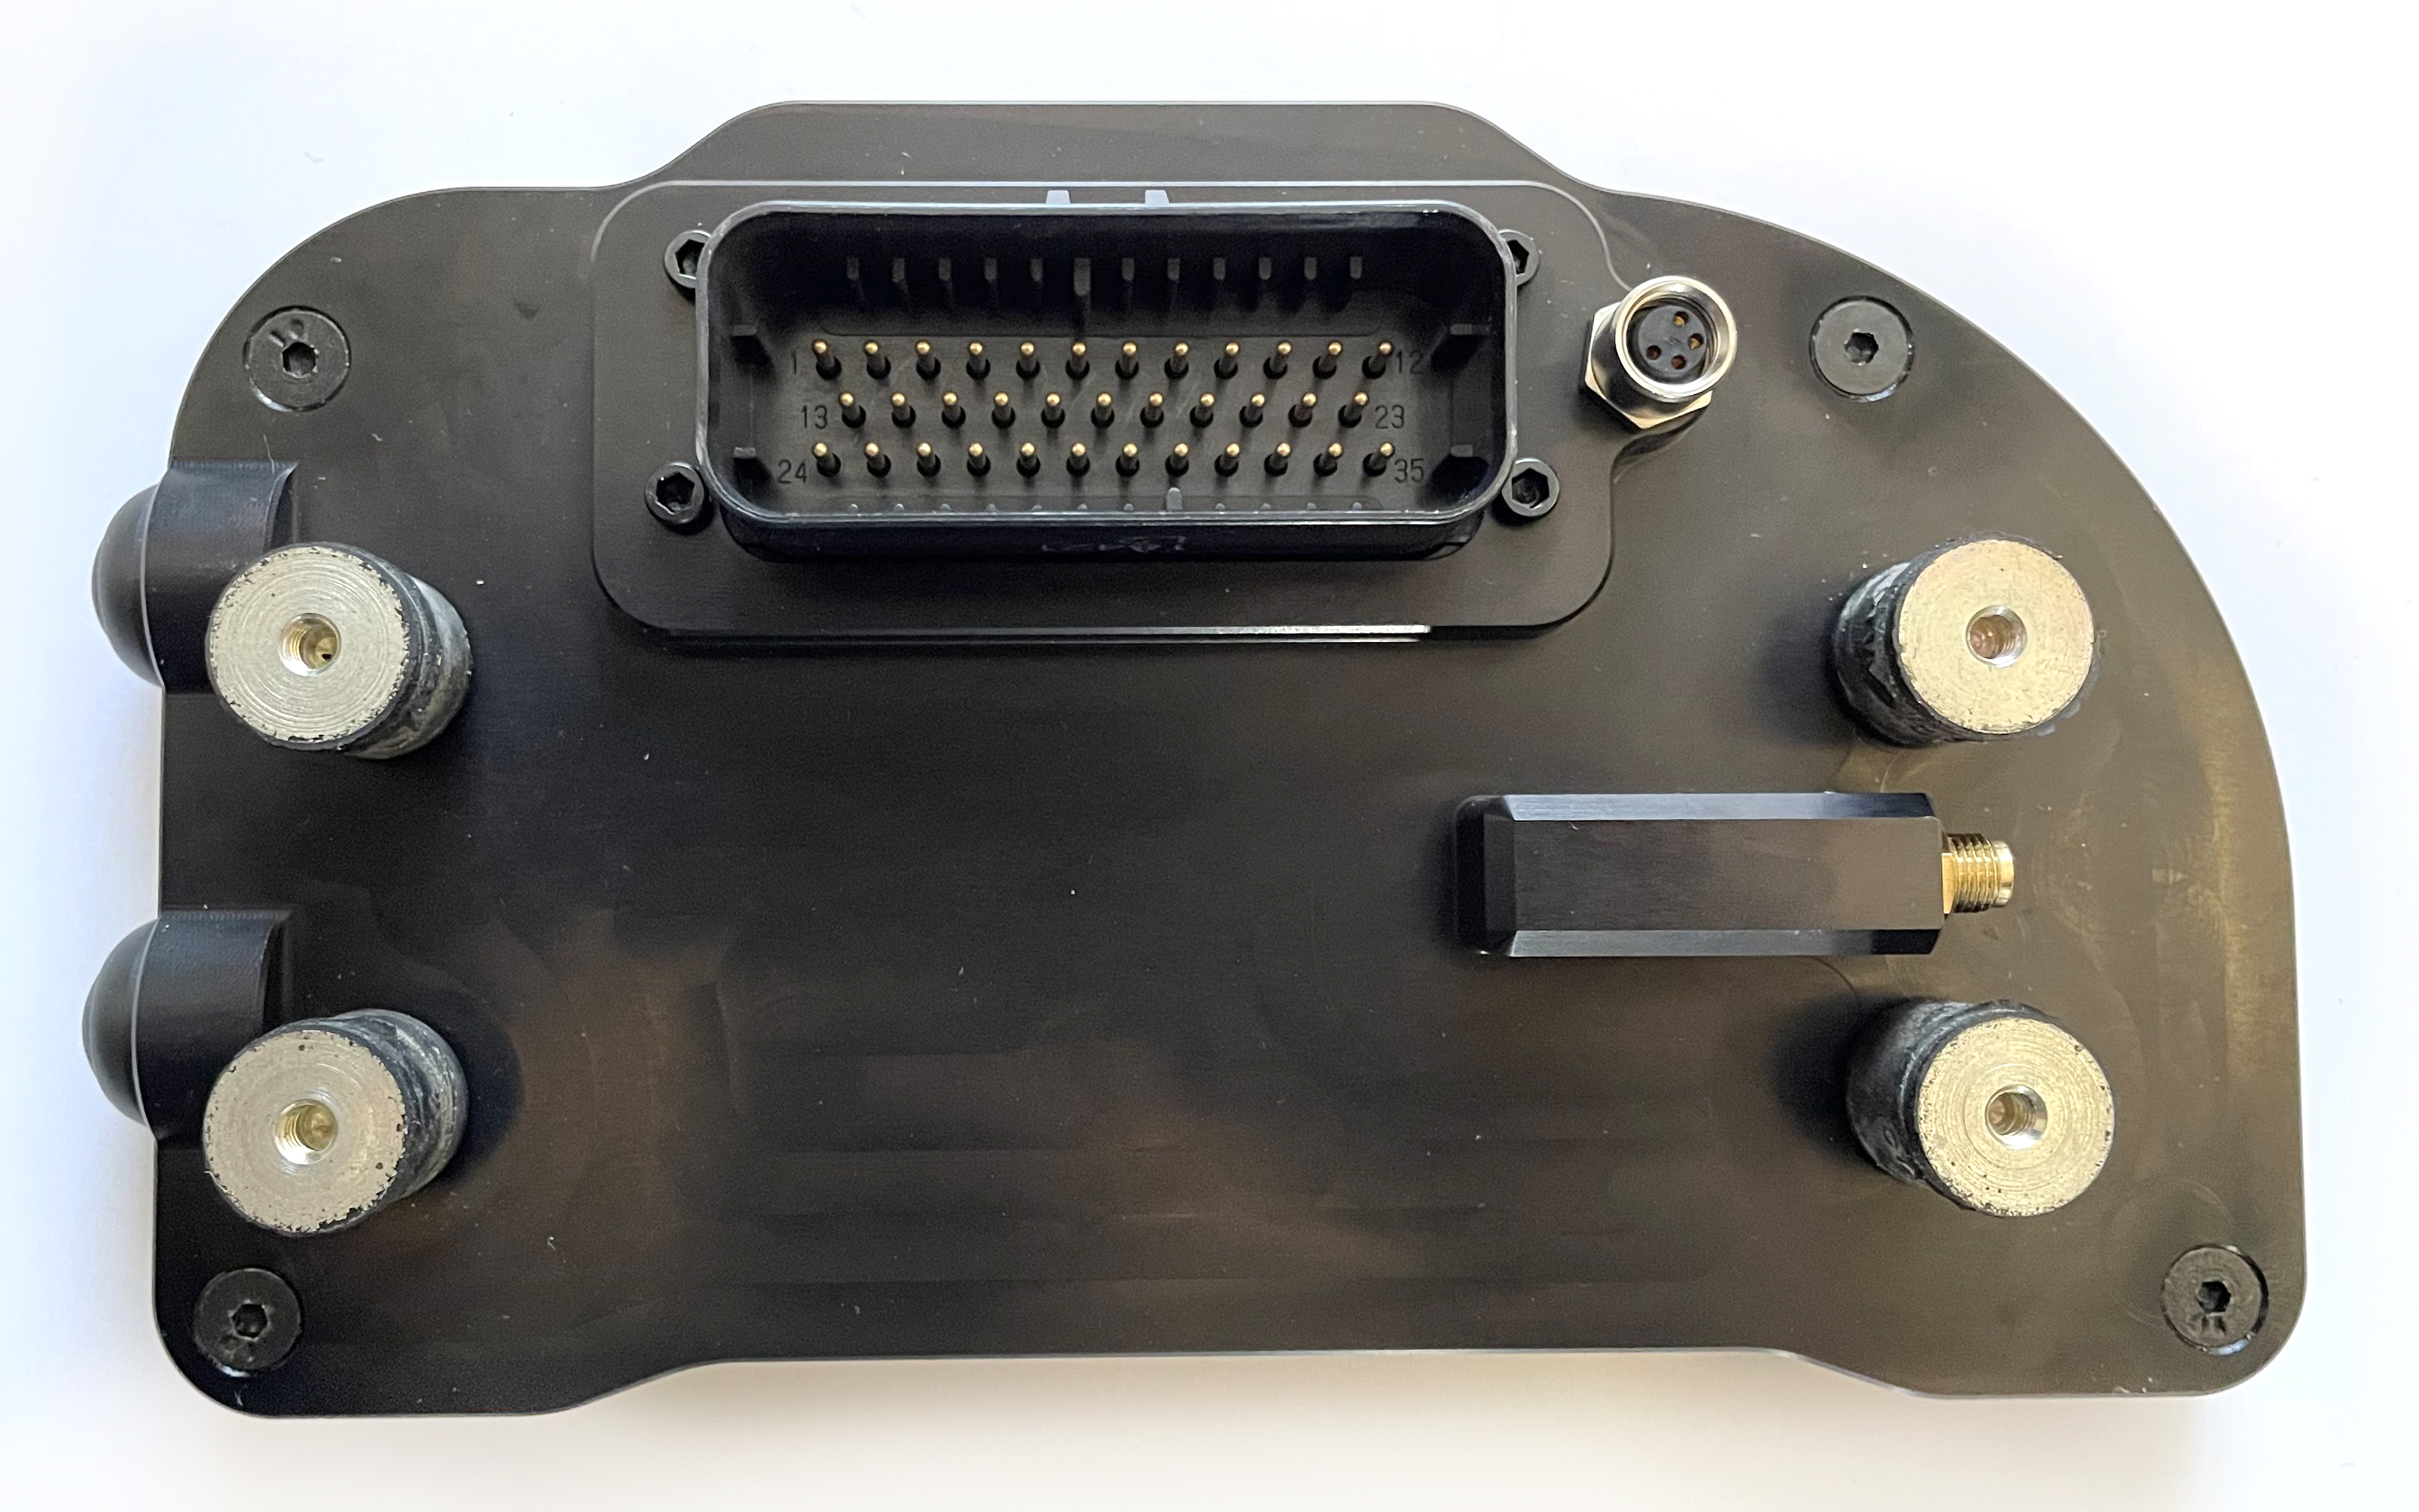
It is possible to distinguish the various Chrome by looking at the back. The Pro2 has a completely different connector and is therefore easy to identify. The Pro on the back has both the antenna connection SMA connector for TPMS sensors and the video input Binder connector. The Plus only has the video input Binder connector while the Lite has a plastic cap instead of the Binder connector. If the back is different from those in the photos and there is no plastic cap in correspondence with the video connector then it is a first generation Chrome.
Lite
Plus
Pro

Pro2
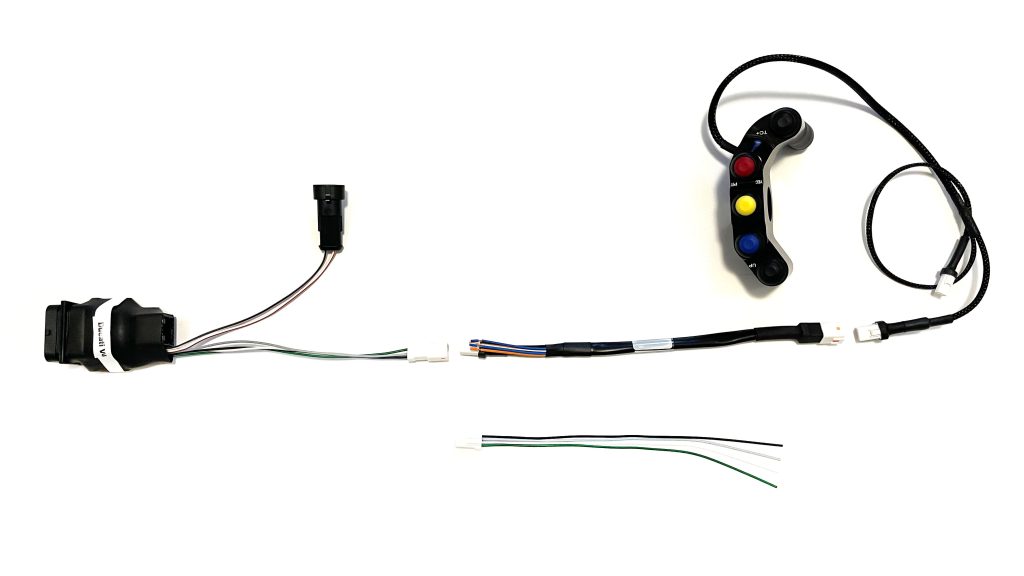
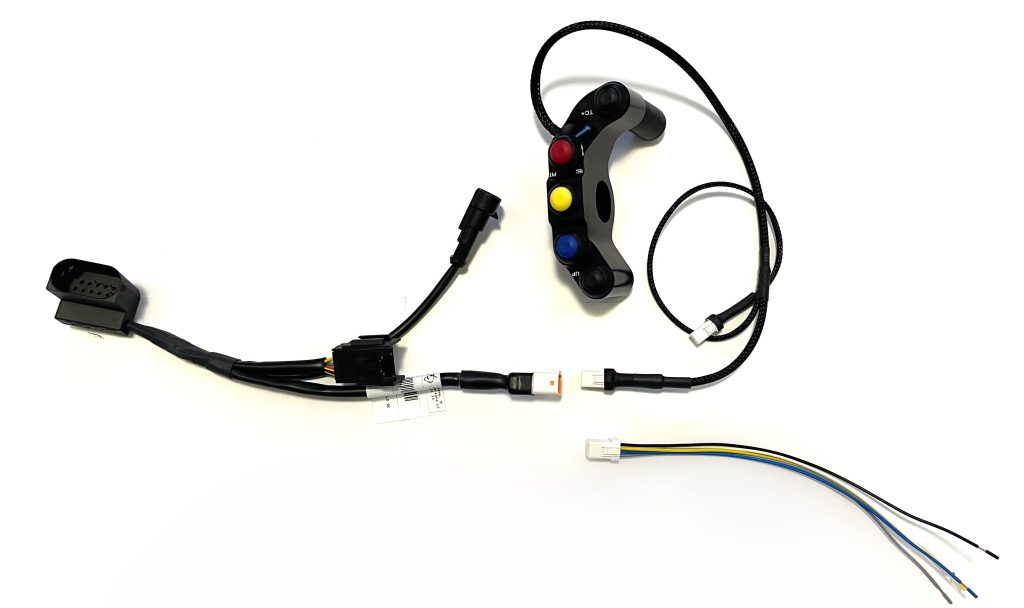
The 7-button I2M left hand switch (code PUL7) is compatible with some motorcycle models such as the R1 15-24, the ZX10R 16-20, the Ducati V4 and the BMW S1000RR from 15 to 24. For these last two motorcycle models the left hand switch must be connected directly to the Chrome adapter. In fact, on these motorbikes the original left hand switch contains dedicated electronics to communicate with the original dashboard. Using Chrome it is no longer possible to establish this communication and the original left hand switch must be replaced with a standard one as indicated in the plug&play kit manual. To use our left hand switch it is therefore sufficient to disconnect the free wires connected to the adapter and connect our left hand switch via the PBM adapter (in the case of Ducati V4 or BMW 15-18) or directly to the adapter in the case of the BMW 19-24 , as shown in the figures below.
Danas
Sensors
Unfortunately, we do not repair damaged sensors. The only spare parts available are:
– molex connector (for all sensors)
– pop joint (for potentiometers)
– molex-AMP interface connection (for pressure sensor)
TPMS
NO. Each sensor has electronics tuned to the length of the antenna. Reducing the length of the antenna could make the sensor unusable. In 2020, the antennas of our sensors were reduced from 8cm to 4cm thanks to a redesign of the internal electronics.
DataLog-PRO
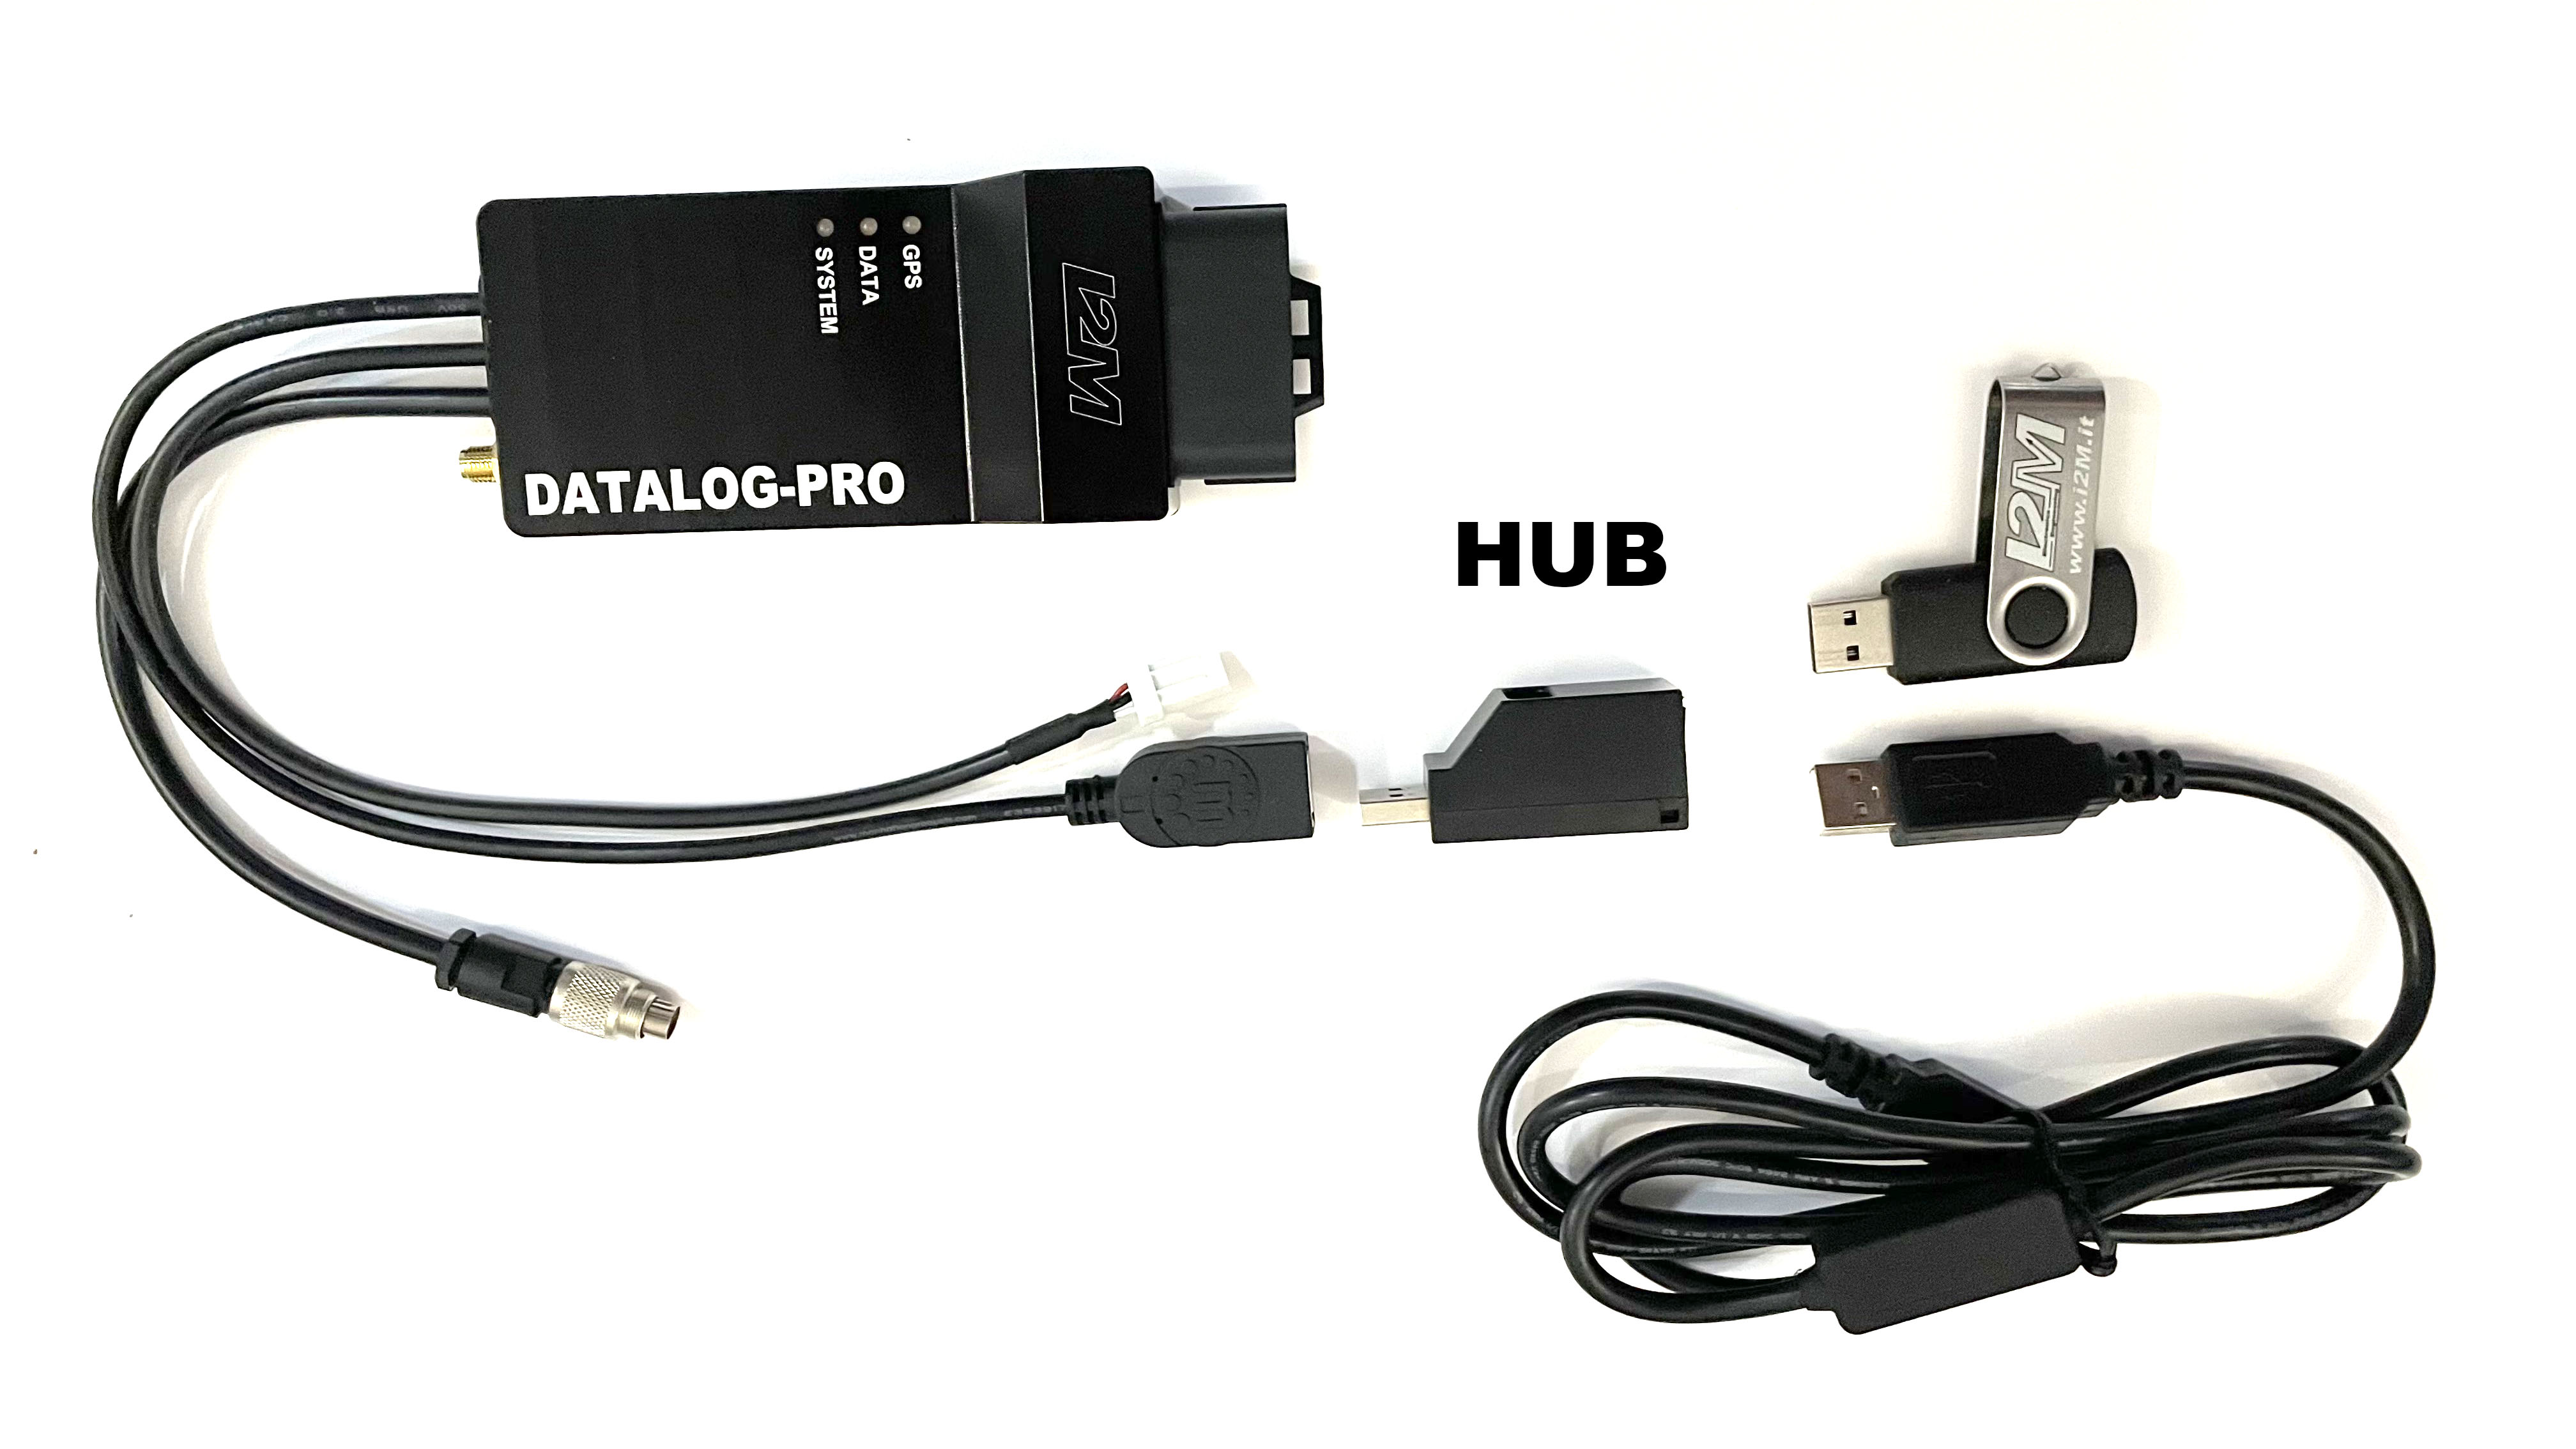
The DataLog-PRO receives commands from the USB cable connected to the PC but at the same time must be able to access a USB memory stick. To do this it is necessary to connect a USB 2.0 Hub to the DataLog-PRO (NOT TO the PC) so as to allow the DataLog-PRO to see both the key and the communication cable at the same time (as in the photo).
It is possible to connect various analogue sensors to the DataLog-PRO thanks to the use of the appropriate sensor wiring (code SOSP2) shared with the Chrome Plus2 and Pro2 dashboards. Unlike the case of Chrome dashboards, however, the DataLog-Pro also requires a ground connection of the sensor wiring, this is carried out via the appropriate ground strap (GND code) to be connected to the appropriate connector on the sensor wiring on one side ( small connector positioned in the middle of the cable harness and integrated into the cable harness itself) and the negative battery eyelet.
Without this connection the analogue reading would be totally random because it lacks the mass connection.